Campaigns
Campaigns are an automated Voice messaging service. Campaigns are sent to Distribution lists that are uploaded to the system in advance.
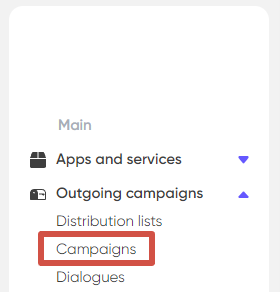
To open Campaigns, use the corresponding item in the left-hand menu of the personal account dashboard.
“Campaigns” page contains the list of all your mailings (folder “All”). They are also such folders as “Draft”, “Launched”, “Paused”, “Finished” which refer to the statuses of the outgoing campaigns.
If necessary, use the additional filters at the top of the page to refine your search or sort the campaigns, then click “Show”.

Each campaign in the list is displayed as an information block (card) with a set of statistics. To view detailed information for a specific campaign and export the report to a file, click the “Details” button in the lower-right corner of the card.

The report may contain errors related to completed calls. To learn more about the possible errors you may encounter, click here.
If you click on the block itself you can access the page with the expanded data about the outgoing campaign. Here you can change the status of the outgoing campaign and edit it with the “Edit” button.
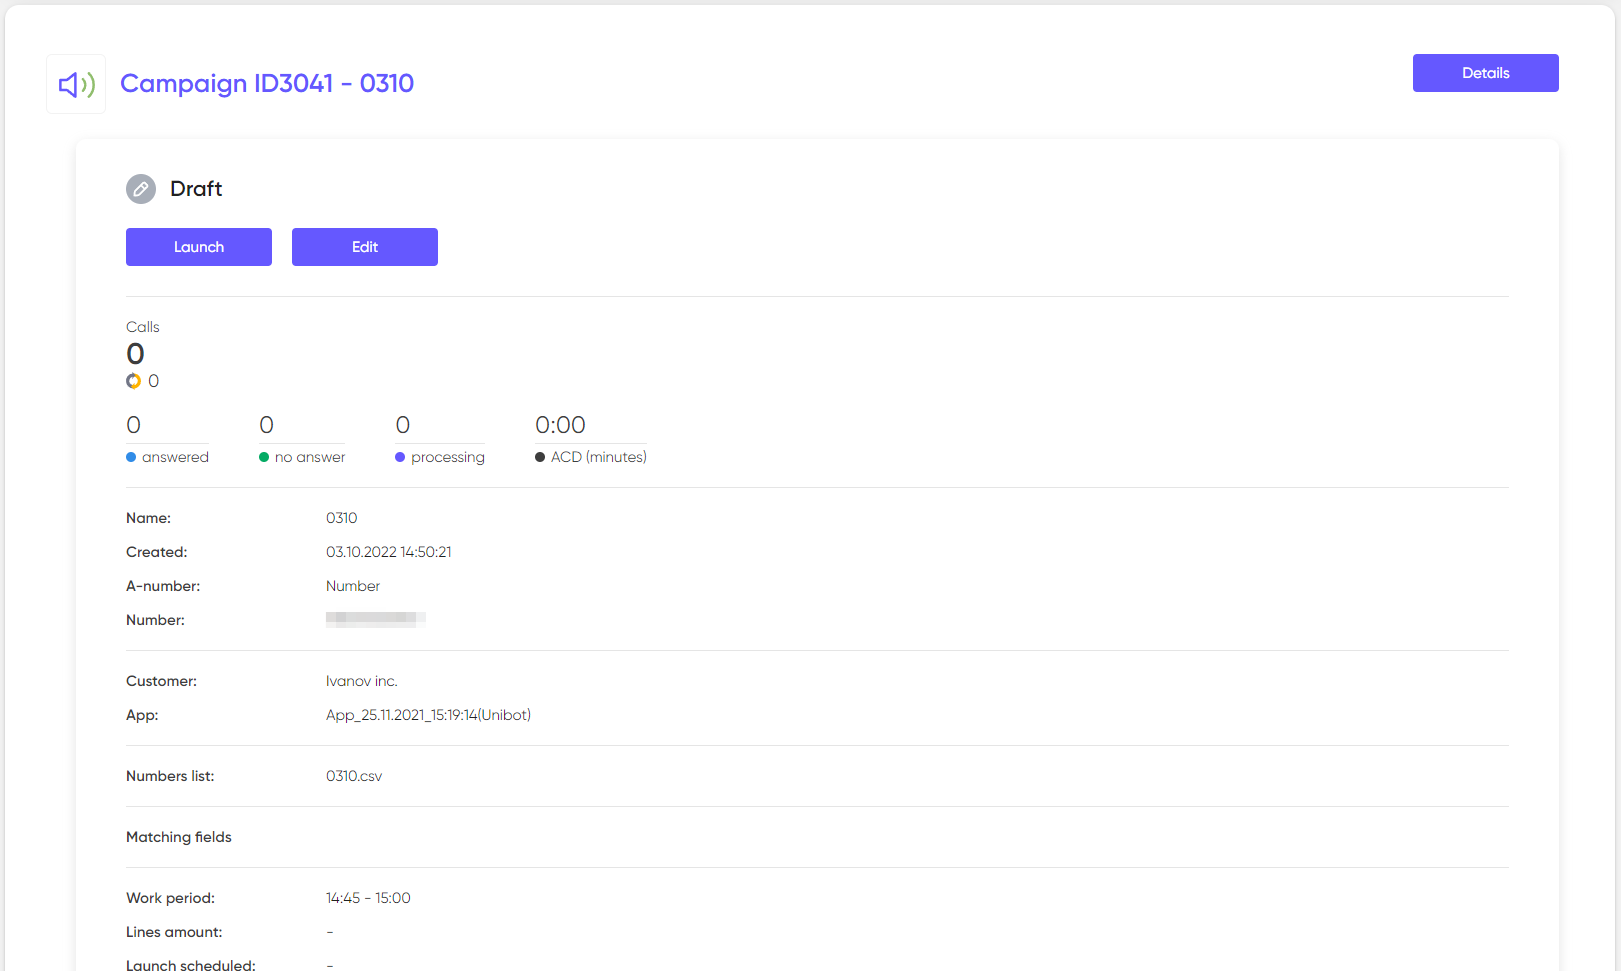
Status is changed with the special buttons under the outgoing campaign status. Pay attention that changing is only available for the outgoing campaigns with the “draft” and “paused” statuses.
If you want to change the outgoing campaign which has no “draft” status specifications you must pause it. Then “Edit” button will become clickable.
Creation of an outgoing campaign
To create a new Voice outgoing campaign press button in the upper-right corner of the outgoing campaigns list. You will access the Outgoing Campaign Creation Master programme.
Master Programme contains of different blocks which you will have to fill before you can start your new outgoing campaign. Every block has its own number. If any of the required parameters is missed or not done correctly number of the block will change to the exclamation point. That means that you have to come back to this block and edit it. After everything is done correctly the block number ill change to green check mark and the “next” button will become clickable. Outgoing campaign can be launched only after all the blocks will be marked with green check box.
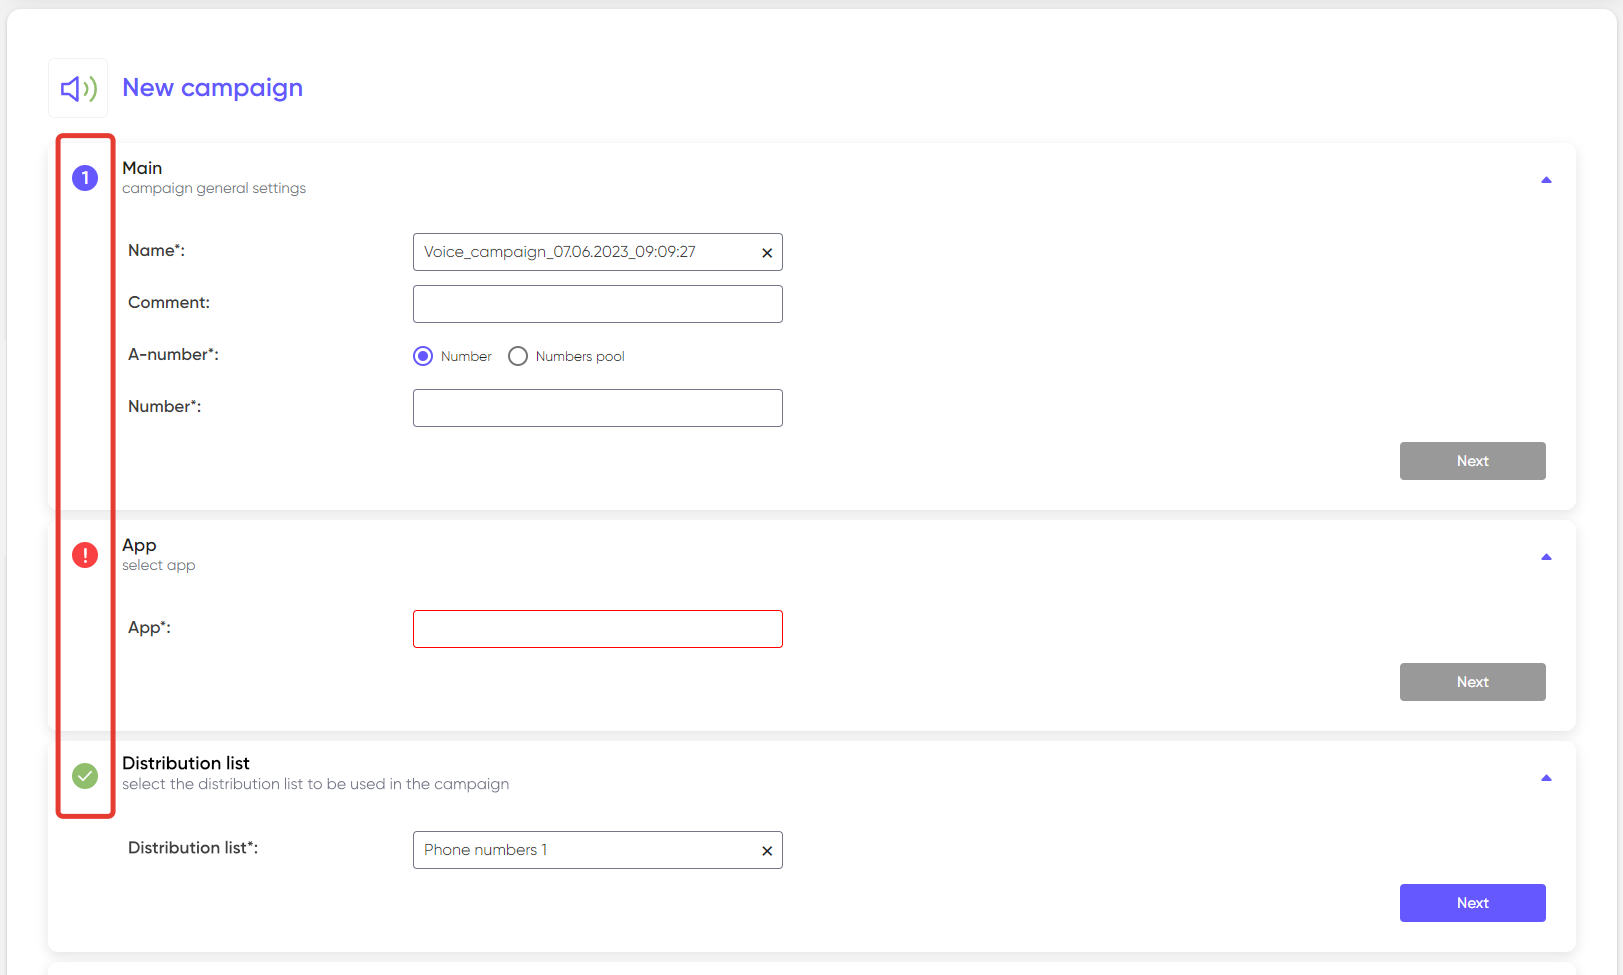
The red lining around any cell marks that:
A) Required cell was not filled
B) It was filled with invalid values or with the values which exceed the permissible
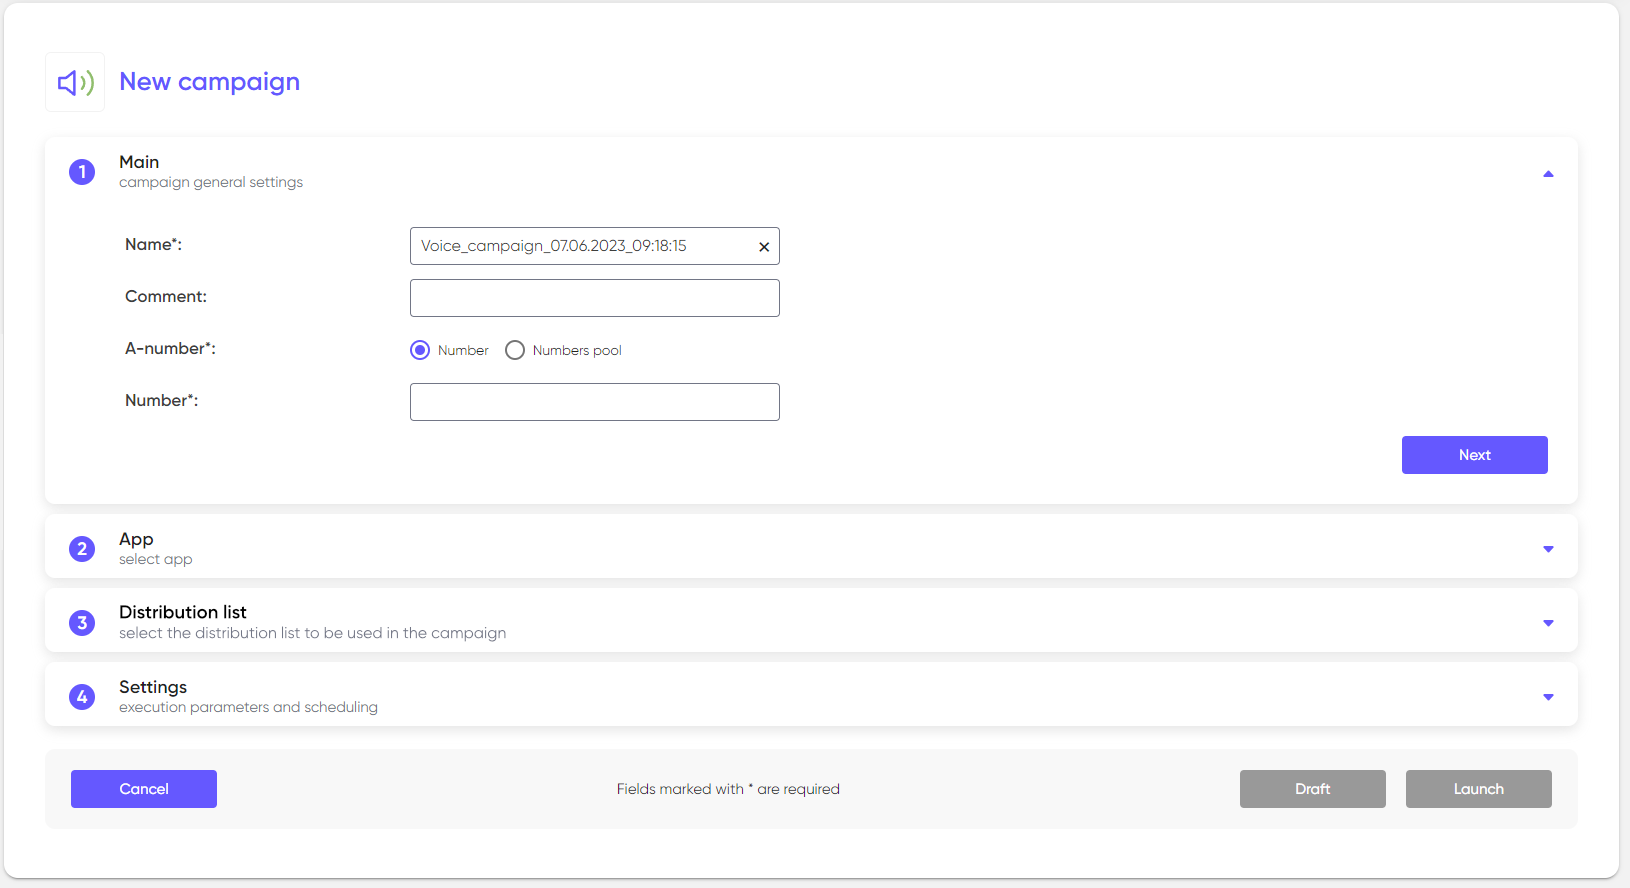
After all the blocks in your new outgoing campaign are filled correctly you can save it as “draft” of launch immediately by pressing the button in the lower part of the Master campaigns page.

After that you will be redirected to the page with outgoing campaigns list where you will find your new project.
Voice outgoing campaigns
In this type of outgoing campaigns calls are implemented through the algorithms designed in Scenario Builder.
Master Creator of Voice Campaigns contains of 4 steps.
“Main” block contains the main settings of the new outgoing campaigns. The first step is to give the name of the campaign or leave the automatically generated one. Pay attention that this cell is required and marked with the “star” mark. You can use any name that you want, but it must not contain special symbols. You can use “-“ or “()”.
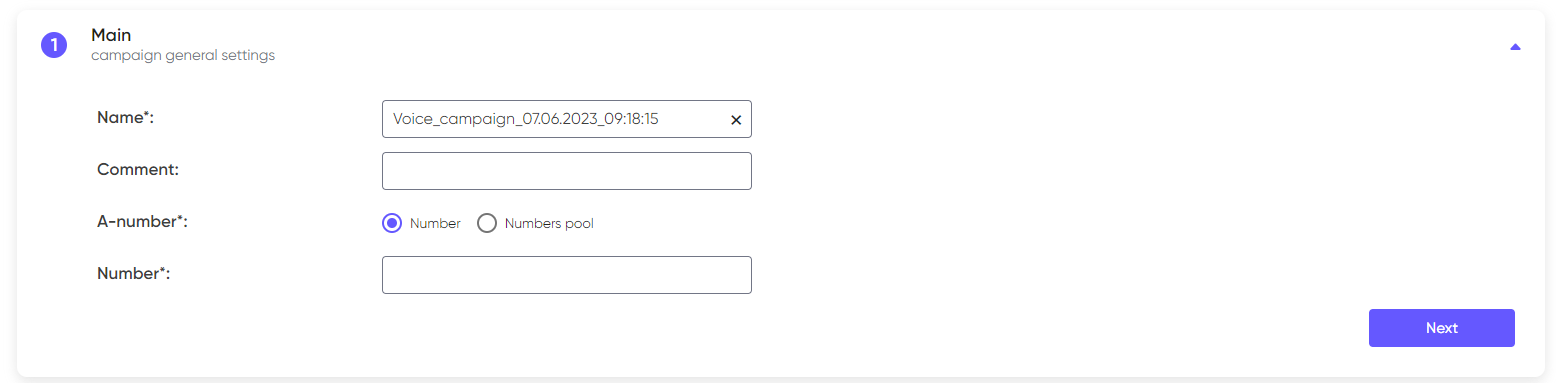
Commentary cell is not required. If you want to add any additional info about exact campaign you can do it through “Comment” or leave it blank.
“A-number” cell is the required one. In this point you need to choose a number or a list of numbers which will be used in frames of outgoing campaign as the sender. If you choose “Number” option all the calls will be performed from one number, if you choose “a list of numbers” calls will be performed from the numbers contained in the list in mixed of strict order.
Pay attention that you can’t enter any number, but you can only choose the ones that were given to us by your manager and added to the system by our specialists. The same applies to the Numbers pool.
The next block – “App”

Choosing of app is a required step. Without it your campaign will not be launched. You just need to choose an app with the prepared call scenarios from the list. This app will be used in your outgoing campaign.
“Distribution list” block.

It is a required step. In this block you will to choose the distribution list which will be used during the campaign. After you choose the distribution list the list of values chosen on the previous step will appear. Against every value will appear a field with the names of the columns in distribution list. Check the values with the names of the columns.
“Settings” block
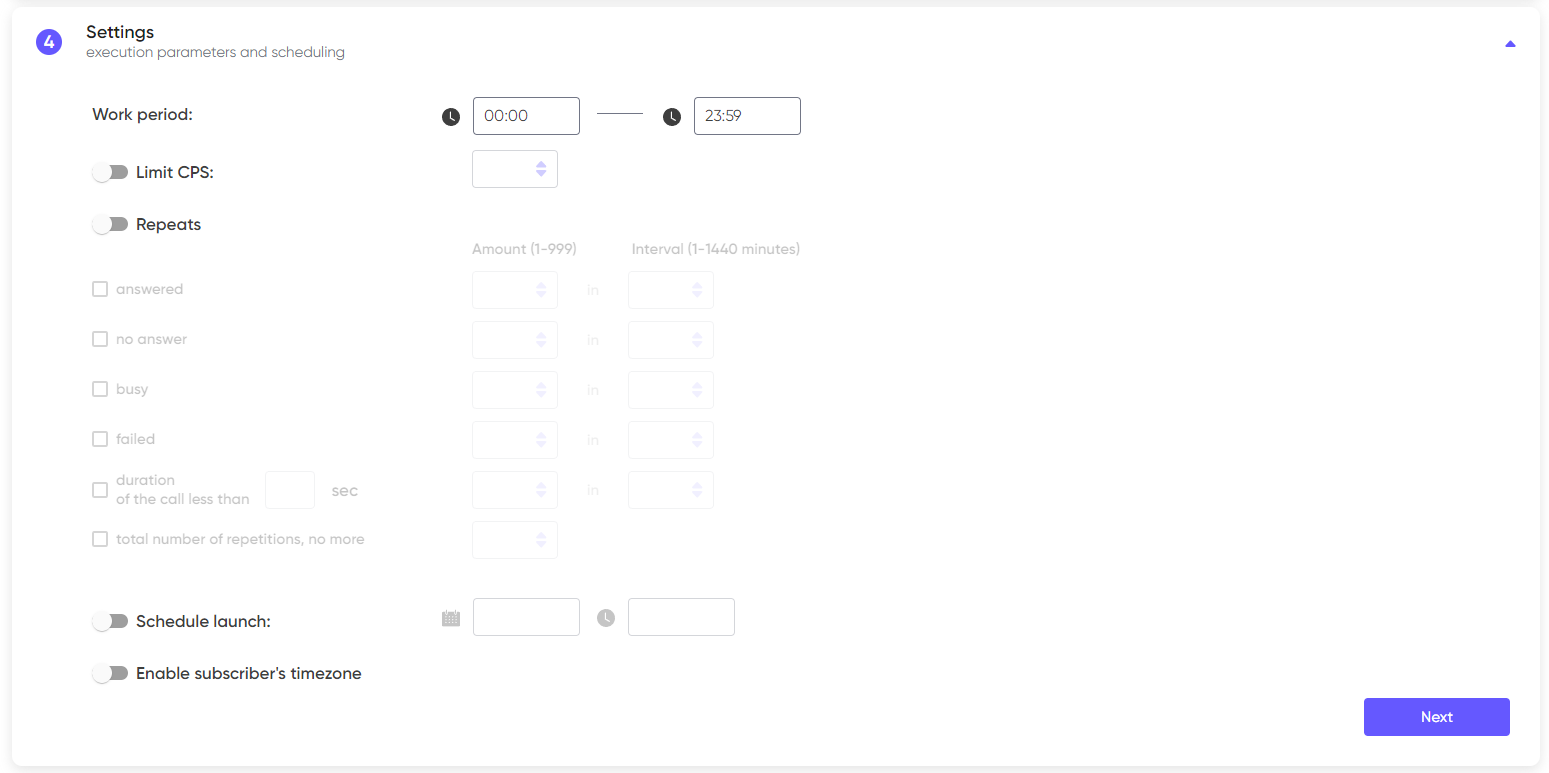
This block contains the set of parameters which can be used to specify the planning and program the work of system in frames of outgoing campaign. You can specify such parameters as:
1. Work period
2. Limit CPS
3. Repeats
4. Schedule launch
5. Enable subscriber’s timezone
Work period
This parameter allows you to set the time limit of the call campaign among subscribers. This parameter is set as “all day”.
Limit CPS
Enable this parameter if you want to restrict the amount of the phone lines which will be used to perform calls. It is allowed to put a restriction from 1 to 50 phone lines.
Repeats
Activate this parameter to make the system perform repeatable calls when:
1. Subscriber received the call (answered)
2. Subscriber didn’t pick up the phone (no answer)
3. The subscriber was occupied (busy)
4. The call failed to reach the subscriber (failed)
5. The call was successful, but lasted less than the specified time (duration
of the call less than)
For every case you can specify the amount of repeats (from 1 to 199) and the period of repeats (from 1 to 1440 minutes).
The “total number of repetitions, no more” parameter sets a limit on the total number of repetitions of calls of any type.
Schedule launch
This parameter allows you to specify the delay of the launch of the campaign. Activate it if you want the campaign to be launched automatically and specify the date and time of the launch.
Enable subscriber’s timezone
When this parameter is activated, the system will make calls to subscribers in the interval of the set campaign period, adjusted for their time zone. If the parameter is deactivated, the calls will be received according to the time zone in which you were at the time of creating the campaign.